zucchini bread pancakes

IMGP5157 IMGP5165 IMGP5168okay, this is not a recipe post so much as a strong suggestion that you (especially if you have a surplus of zucchini lying around right now) immediately make plans to cook and eat these zucchini bread pancakes from smitten kitchen.  my whole family happily eats them, they hold a ton of zucchini and if you need to use yellow summer squash instead, that works too (these pictured above are half-and-half).

or… if you’ve got some picky eaters in your house who can’t handle the green stuff, i highly recommend my new favorite recipe for classic pancakes.

IMGP5013

Posted in summer, yum | 1 Comment

summer smoothies

August 2013
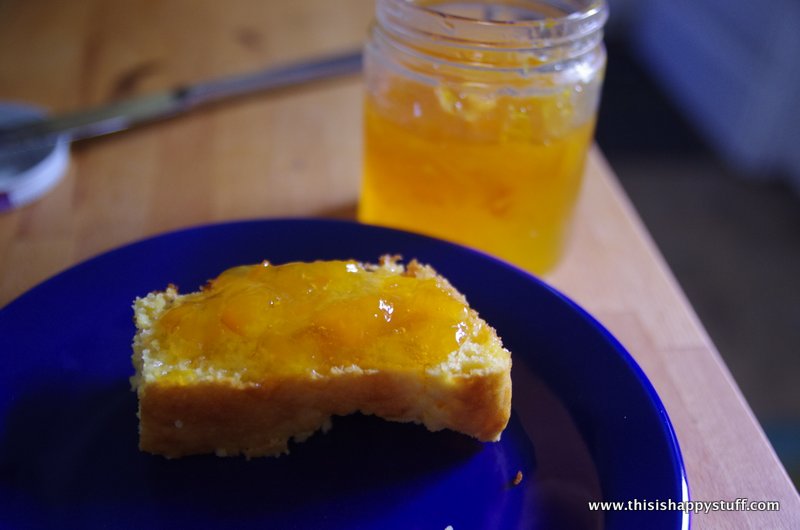
during our recent trip to texas, i discovered that one of my dear aunts has developed a breakfast smoothie habit just like i have.  this was awesome news for several reasons–first, because it meant i could get a smoothie for my own breakfast without having to give my host a special list of ingredients to get from the grocery story and second (and most exciting to me) because this particular aunt likes to experiment and tinker with recipes even more than i do and she comes up with fantastic combinations!  i’d gotten into a bit of a rut with my smoothies (always with the spinach, always with the almond butter…) and she inspired me to try other vegetables and other protein/fat sources.  plus, she had this brilliant use-similar-colors idea that makes the most beautiful beverages (while the brown ones were tasty, they aren’t the most visually appealing)!

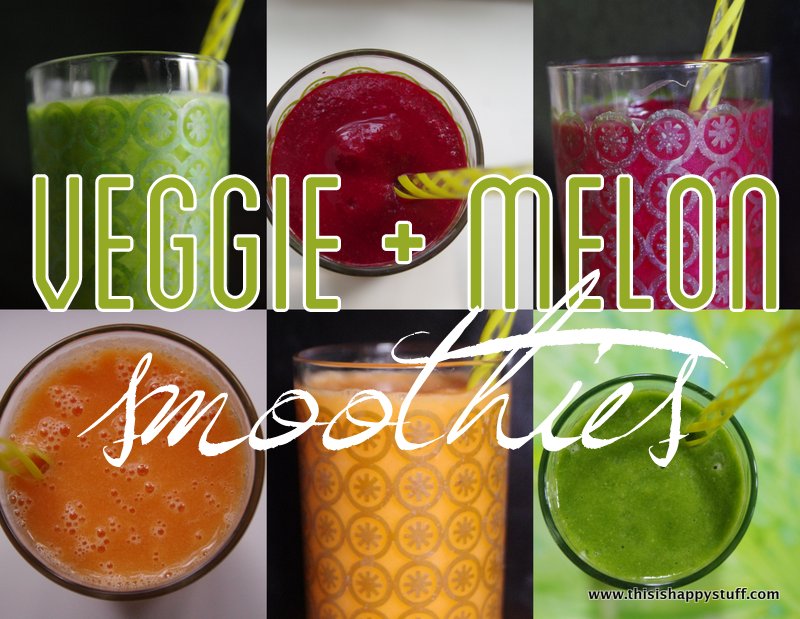
inspired by her, i’ve created three new favorite summertime veggie and melon-based smoothies that i thought you might enjoy.  the ratios are flexible, depending on how sweet/cold/thick you like your smoothies, so i’ll just list approximate quantities.  if you really want exact measurements, let me know and i’ll measure more carefully the next time i put these together.

IMGP5181
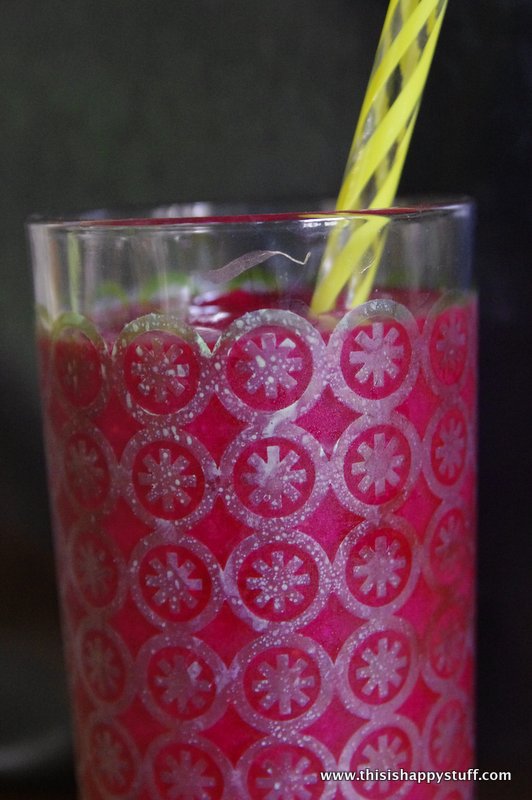
watermelon + beet smoothie  (this one is such an amazing color!)

— 1.5 c. watermelon chunks (this becomes the liquid for this smoothie, so you might want to blend it up first.  if you have a good blender, you don’t need to remove the seeds.)

— 2 small beets, raw, peeled (or one small one if you really hate beets and need to hide the flavor.  even two are pretty subtle with this mixture.)

— 1/2 c. frozen raspberries or mixed berries

— a small splash of pure vanilla extract

— optional add-ins:  chia seeds, plain yogurt

IMGP5186
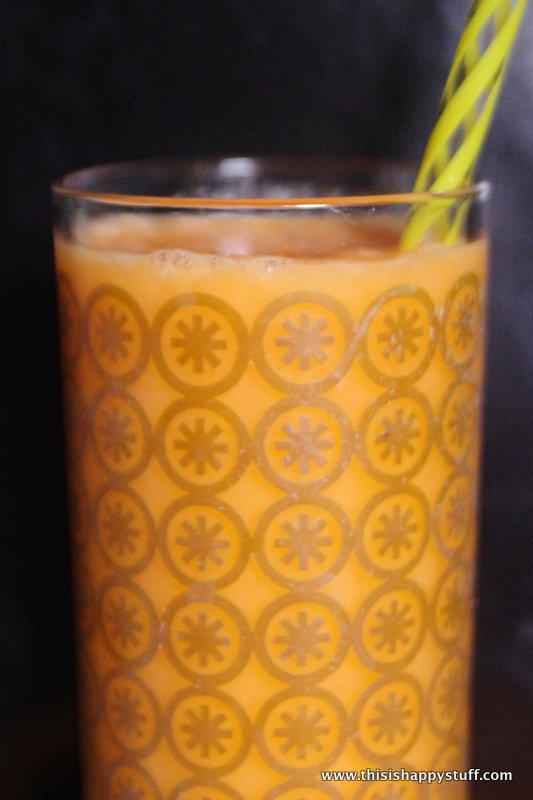
cantaloupe + carrot smoothie

— 1 cup ice cold water with a squeeze of fresh lemon

— 3/4 cup cantaloupe chunks (seeds are great to add in here too!)

— about 10 raw baby carrots (or equivalent amount of “grown-up” carrots)

— frozen peaches (about the equivalent of 3/4 a whole peach)

optional add-ins: flax oil, fresh squeezed orange juice

IMGP5155
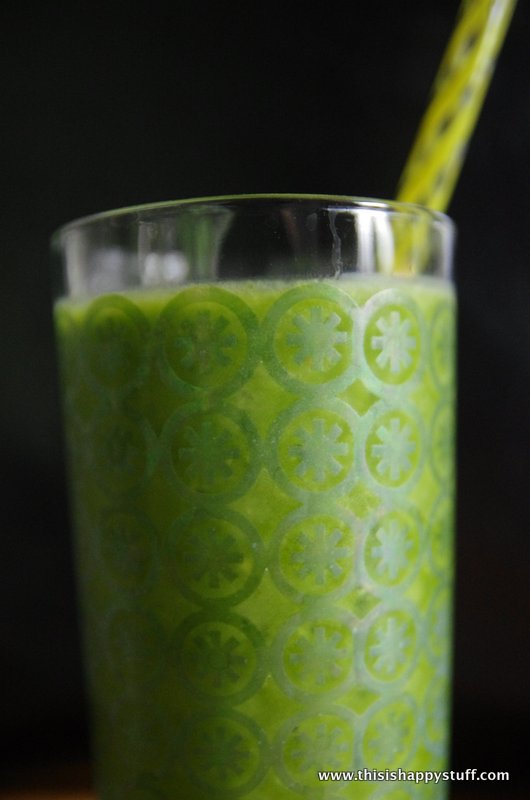
honeydew + spinach smoothie

— 1 c. ice cold unsweetened fresh mint tea (boil fresh mint leaves the night before and store the tea in your fridge overnight.  do not add any sweeteners.)  OR just use ice cold water and some fresh mint leaves

— 1 c. honeydew melon chunks

— two huge handfuls of spinach (even wilted is fine, stems are fine, rinse any sand off if necessary)

— 1-2 tbsp. raw pepitas (pumpkin seeds without the shell)

— 1/2 c. frozen pineapple

optional add-ins:  cucumbers, lime juice


general tips for all of these:

–add these to the blender in the order they’re listed

— if it’s not sweet enough, add more melon or a splash of vanilla

— if it’s too thick, add a bit more ice water and blend like crazy

— if it’s too thin, add more frozen fruit

— if it’s too “bright” consider a dash of cinnamon to “warm it up” a bit


these have been so refreshing the last few mornings i’ve made them.  i hope you enjoy them as much as i have!
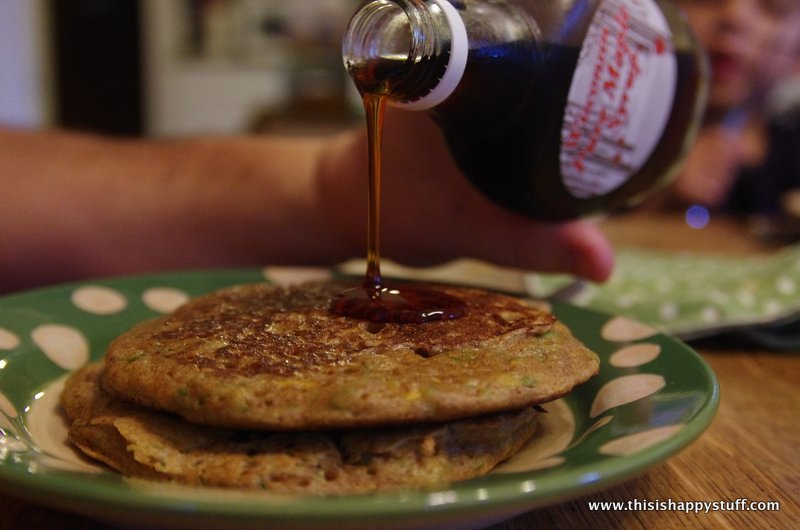
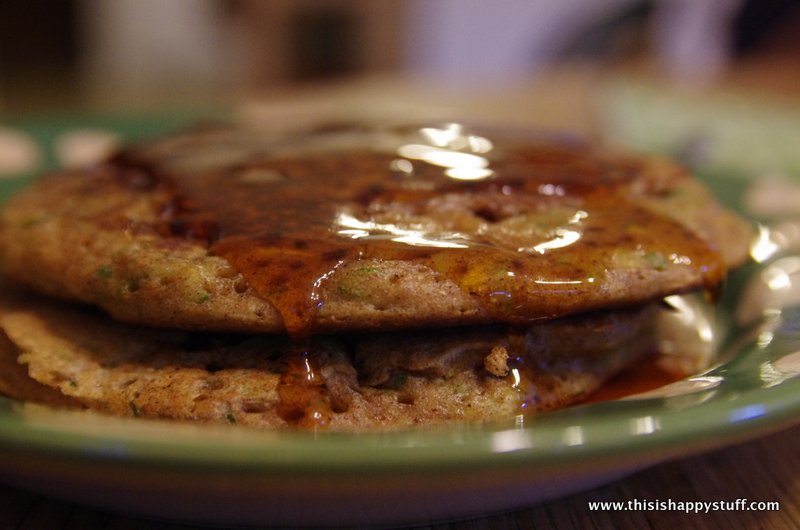
Posted in clean, summer, yum | 1 Comment

hello, apricots

IMGP5057-001 i wanted to make another movie monday to share with you, but my computer hard drive is too full for me to download any more movies until i go through and clean it up a little.  so instead, for now, i’ll share some pictures of a gorgeous batch of apricot jam that i made last weekend.IMGP5063-001 the guy at the farmer’s market stand where i bought these apricots said, “you wanna make jam?  i’ll find some seconds with blemishes and give you a discount.”  he was quite generous with his definition of a blemish and with his discount, so i had plenty to make jam and a few leftover that i’m trying to decide exactly the best way to use them before they spoil.IMGP5073-001 spread on a slice of cornbread seems pretty awesome.IMGP5086-001many thanks to all of you who have sent lovely messages about my mom.  she is doing quite well and is anticipating returning home this weekend.  i’ve got plane tickets to go for a long visit at the end of the month.  i think i’ll take her a jar of this jam.

Posted in summer, yum | Comments Off on hello, apricots

movie monday: cow chicken no. 5

and because i know my mom loves these…  here’s one i pulled together from some leftover bits of cow chicken 4..


Posted in video | 1 Comment

difficult news

IMGP2370

There is nothing like a near-brush with death to show you how far the circles of your life spread out around you.  About a week ago, my mother lost her balance, fell down some stairs, broke her back and now her legs are paralyzed.  I started a caringbridge site for her to post updates for friends and family and the “guestbook comments” started coming in from all over the place and from so many different periods of my mom’s life.  It was fascinating to see how those circles grew over the course of the week (granted, I’m viewing this all from afar.  I can only assume it was even more impressive to my parents who are standing in the eye of this storm.)  It began on Saturday night with emergency calls to family, then as we learned the extent of the injuries, the circles grew to include local friends and work colleagues next and as we began to understand the longer-term implications, the news spread to friends who live farther away, ones we don’t see as often.  Then, as they spread the news, we began to hear from friends we hadn’t had contact with in ages, or acquaintances who know us through mutual friends or family but who are so affected by my mom’s accident that they reach out, sharing their prayers and well-wishes for us.  the circles grow wider and wider (many of the people who’ve responded are people i’ve never met!) as we remember other important folks who aren’t connected to anyone else who knows yet and so must be contacted with the news.

every time i share the story with someone for the first time, i sit with them as they tumble through the same shock, denial, and sadness that have sat on my shoulders long enough at this point that they don’t seem as sharp as they did before.  watching someone else take in the enormity of this story is …. difficult, as it can sometimes tear open again this wound that is only just beginning to scab over for me.  i feel as though i’ve watched several of my friends walk their own sad paths recently and i’ve always wondered what the “right” thing to say to them is so i thought i’d share the insight i’ve gained from being on this side of difficult news.  for me, the perfect response changes over time.  for the first day or two, my favorite responses were (in no particular order):  a tight, wordless and immediate hug from a friend when she first heard the news; friends who wrote and said, “you must be feeling so scared/shaken/like your world has turned upside down.”(because those were all emotions that i was feeling, but hadn’t yet been able to name for myself and as soon as they were named and i could face them directly, the urgency eased.  the numbness had names and i could deal with them better); friends who offered to drop everything and hop on a plane to help out with a complicated related side-issue that i was dealing with at the same time.  other perfectly fine responses were a simple, “i’m so sorry to hear about your mom,” or  “we’ll keep you in our prayers.”

the only awkward response to the news that i got were people who were so startled by the news that they replied with the automatic “is she okay?”  um, well?  i suppose it depends on your definition of okay?  but please don’t feel bad if you were one of the people who said this to me–i’ve done it myself!  every time i call mom to chat, i end up starting with, “how are you?” and there’s this sort of awkward pause because, “i’m fine” doesn’t really apply, but she doesn’t want to start the conversation with a whole litany of what’s not fine.

now that a little more time has passed, i’m finding myself hesitant to share the news with friends or acquaintances who currently have no idea what’s going on because as soon as i share, i’ll need to be strong as they flash through their mirrored, empathetic grief unless i want to get pulled into that dance again myself.  also, as soon as i share, the whole rest of the conversation will be about the accident and the aftermath and honestly, it’s refreshing to have “normal” conversations about everyday things and take a break from thinking about how much our lives have changed in such a short period of time.  i could see how those exact same responses that worked so well for me in the first few days after the accident could have the opposite effect on me at this point.  now, if people want to talk about it, i hope they just say something simple along the lines of, “wow.  that’s going to have a huge effect on your lives, isn’t it?  how’s your mom doing now?” but i’d be forever grateful if they could somehow manage to say those words without a trace of pity.  because yes, this will change our lives and yes, my mom does have a long road with a lot of hard work ahead of her and yes, there will be losses (both big and small) that we’ll discover along the way that will take our breath away (i was lucky enough to have a gift certificate for a pedicure this past week and i realized my mom would never be able to enjoy a leg massage in the same way again.  i hadn’t mentioned my story to the nail technician, so i’m sure she thought it a bit strange that her soothing leg massage brought me to quiet tears.) but …. here’s the happy stuff:

my mother is alive.

my mother has full use of her arms and fingers and hands.

my mother can breathe on her own.

my mother (despite sustaining a large gash on the back of her scalp) did not damage her brain during the fall.

she is still my mother.

she can still do amazing things.

and she has enormous circles of friends and family who love her and are praying for her and cheering her on and what a blessing it is to be able to witness those circles and hear those words of love before we are gone from this earth.

Posted in Uncategorized | 8 Comments

marshmallows from scratch

IMGP3877most of you have been reading my blog long enough to realize that whenever i promise to post something, it might take me awhile to get around to actually writing the post, but i think i usually get around to promised posts eventually (**now is your chance to put in a request for a post i promised long ago and that you’ve been waiting with bated breath to read ever since!**).  such is the case with homemade marshmallows.  i’ve had these pictures on my computer for a looooong time, but forgot to write the post until now.  not that there aren’t a million billion tutorials on marshmallows out there already and not that i’ve got this process completely ironed out yet, but here’s a few tricks i’ve learned so far.

(note:  this recipe at epicurious is the one i more or less follow)

#1–oil the pan, put down a generous sheet of plastic wrap on top of the oiled pan and then oil the top the plastic wrap.  (so the layers go:  pan + oil + plastic wrap + oil + marshmallow goo)  the plastic wrap should overlap the edges of your pan enough to form handles to lift the marshmallow out when it’s all done.  don’t add flour or powdered sugar or anything else to the oiled surface.  this step makes taking the marshmallows out of the pan sooooo much easier and clean-up is a breeze.  you can add the powdered sugar to the outside once the marshmallows have been cut.  note:  the flavor of the oil will affect the flavor of your marshmallows, so if you use old canola oil that’s been sitting in your cupboard for a year or more (just speaking in hypotheticals here, of course.  ahem.), your marshmallows will have a faint stale taste, even when fresh.  lately, i’ve been using some sunflower seed oil i found at our farmer’s market.

IMGP3934 IMGP3936 IMGP3939

#2–sprinkle the gelatin over the water and then walk away and let it sit until it looks “brainy.”  (that pile of dry gelatin on the top is probably not supposed to be there…)

IMGP3930#3–the trickiest part of this whole process to explain online (and to understand in person) is how long you need to boil the sugar mixture.  This is where the magic comes in and where you have to walk a fine line between making marshmallows and making peanut brittle.  I’ve tried doing it several different ways and honestly, all of them are more or less successful in the end, although I’m still not completely convinced that mine are quite the right consistency when i pour them into the pan to cool, but here are a few methods for you to try:

–candy thermometer:  wait until it reaches 240 degrees.  (a bit tricky if your thermometer isn’t digital)

–ice water baths:  check it until it’s in the “soft ball” stage

–walk away until it smells right.  this is how my friend taught me.  she makes these professionally, so i’m not sure i’d recommend this method to a newbie, but having done it a few times, there is definitely a carmelized sugar smell that starts to curl around your nose when the sugar reaches this stage.

IMGP3926 IMGP3932

you should also note that you do not need to stir the mixture the whole time it’s on the stove.  stir it a few times at the beginning to incorporate all the ingredients, and then stir a few times until it comes to a boil and turns clear, but once it boils, just leave it alone.

#4–when the marshmallow mixture has been beaten long enough, the pitch of the mixer’s whine gets lower and your marshmallow fluff will almost completely fill the whisk attachment, even when it’s lifted out of the bowl.

IMGP3948

it is actually possible to over-beat the sugar mixture at the end of this process (that’s when it starts to become super duper stringy) but you also don’t want to drastically under-beat the mixture.  my professional marshmallow-making friend swears that leaving it in for exactly 10 minutes is enough, but i found that with my machine 10 minutes was too long and left me with a stringy mess (which was a pain to get out of the bowl, but still tasted fine once they dried and were cut and sugared)–maybe because i overcooked the sugar?  here’s a visual clue–when it’s done properly (which mine almost never is), you should get soft peaks when you pull the beater out of the bowl.  if you get no peaks, keep beating.  if you get a long string that connects beater to batter, you’ve gone a bit too long, but don’t worry, it will still work.  after all, it’s really just sugar and you can’t go too far wrong with giant puffballs of sugar.

#5–if you’re desperate for a s’more and don’t have a gas stove to toast your marshmallow over, a toaster oven will work just fine.

IMGP3882does that clarify the process for any of you?  or just make it sound more terrifying to try without an in-person guide to walk you through the process?  what details did i forget?

Posted in tutorials, yum | Comments Off on marshmallows from scratch

movie monday: fishing with grandpa (with guest appearance by one cousin!)

Posted in kid stuff, stuff that makes me smile, trip down memory lane, video | 2 Comments

moooovie toooooosdy: cow chicken, episode 4

Posted in video | 1 Comment

family photos

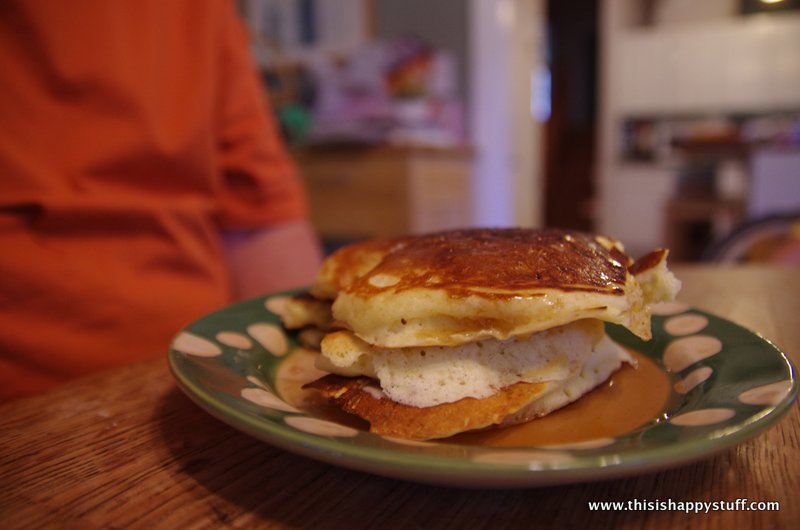
a few weeks ago, we had the great good fortune to have some family photos taken by a friend we met through another friend.  her name is cynthia marie hoffman and she is a poet (in both the traditional, word-sense and in her ability to capture images on film).  she’s not a professional photographer (*ahem* …yet) but if you’re local and interested in having your pictures taken by her, she has given me permission to pass along her contact information, just leave a comment below.

our session with her was so comfortable!  i have tried taking family portraits for friends and there is definitely an art to getting your subjects to relax and act normal(ish) while you try to figure out the best angle to capture their interactions.  cynthia is a wizard at this.  she occasionally gave us bits of direction, but for the most part, she just followed us around, dancing into different positions to get the angles and the light she was looking for.

jump!

she also got the chatty parts right, getting us to smile naturally by saying funny things or asking clever questions.  no one had to say “cheese” all morning.

and he was thiiiiiiis big!

she was totally comfortable horsing around with the happy toddler, snapping shots the whole time (even when he knocked her off balance).

you want to know the best part?these aren’t even my top favorites from our session.  i’m saving those for a special project to be revealed later.

thanks a million, cynthia!

Posted in photography, stuff that makes me smile | 7 Comments

paper worm racing tutorial

IMGP4500-002waaaaaaay back in 2008, i wrote a blog post about some worm races that we held at our library.  this year’s summer library theme is “dig into reading” and my worm race post has been getting a lot of hits lately, so i thought i’d update it with the promised instructions for paper worm races.  i haven’t done this at work recently, but i tried it out with the happy toddler to make sure it worked and we took pictures of that.

what you need:IMGP4482-001–paper

–pennies (two per worm)

–scissors

–double-stick tape

–crayons, markers or something to decorate your worm (optional)

–drinking straw (not pictured above, but necessary for the “racing” portion of this project)

step 1:  tape the two pennies to the paper with the double stick tape. IMGP4485

IMGP4487step 2: draw a long, skinny oval that goes around the pennies and makes a straight line between them (see below).  this is the body of your worm.

IMGP4489step 3 (optional and i forgot to photograph this step):  cut out and decorate your worm!

step 4:  fold the ends of the worm so that the middle curves up (see below).IMGP4490  step 5:  race the worms by blowing air on the front of the worm and then the back of the worm through your straw.  unless you have a very narrow table across which to race your worms, only two racers recommended at a time.

IMGP4497

Posted in fun stuff, kid stuff, library stuff, tutorials | 1 Comment