
way back during celebrate the boy month, one of you, dear readers, asked me to provide a tutorial for how to create your own patterns. i took a bunch of photos of my process last weekend and created the tutorial. of course, after i was all done, i realized that there were some other great tutorials online already (sigh) but mine is a little different (and it shows some trial and error which might be helpful to someone) so i decided to go ahead and post it.
for this tutorial you will need:
a pair of pants that fit well (on the person you’re creating the pattern for)
plastic cereal box liners
permanent markers
pins
scissors
packing tape is also helpful
step 1. unfold the plastic bag that used to hold cereal inside the box.


step 2:Â lay the pants-that-fit flat on your table, inside-out, being sure to line up the front and back center seams.
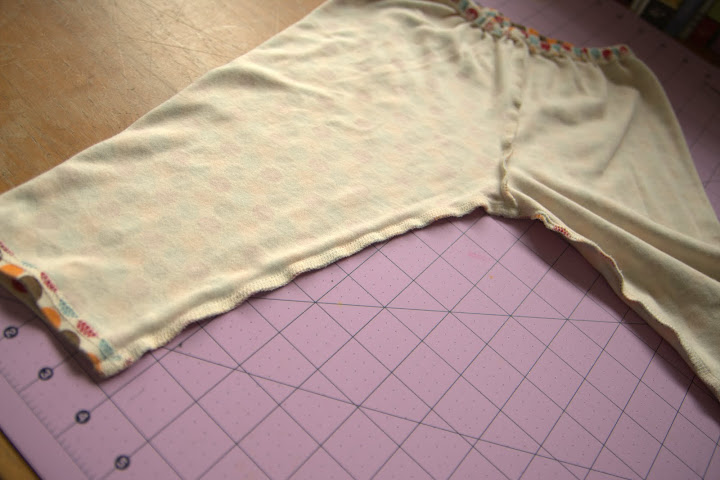
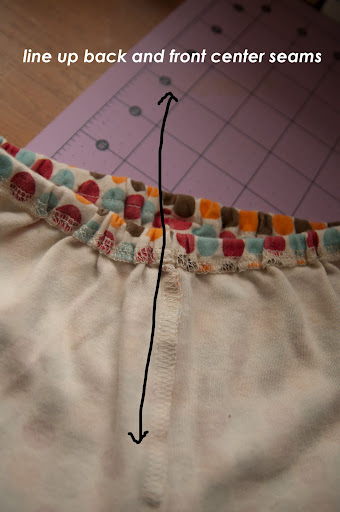
step 3: trace the shape of the leg onto the plastic bag (if the top of your pants has elastic like this sample pair, don’t trace all the way to the waistband yet–i’ll show you a little trick for that in a minute). be sure to add some extra length to account for the hem.

step 4: if you want to get pretty accurate with the waistband, move your pants and plastic to an ironing board and pin the pattern to the ironing board in several spots to stabilize it. then, stretch the waistband just so that the fabric isn’t gathered and pin it down. then trace that silhouette. you might notice that i ended up altering the front center seam line once i had the waistband stretched properly so that the pants laid more flat. also don’t forget here to add a little height to the waistband to accommodate your top hem later.
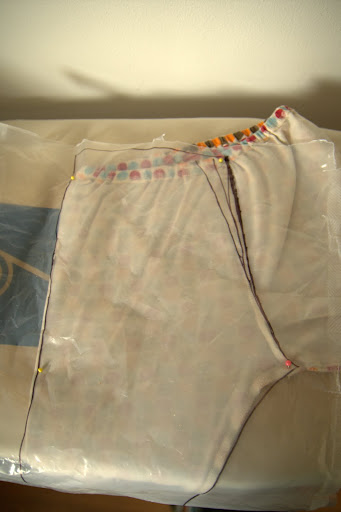
step 5: flip the pants over and repeat this process for the back of the same leg with a new piece of plastic.
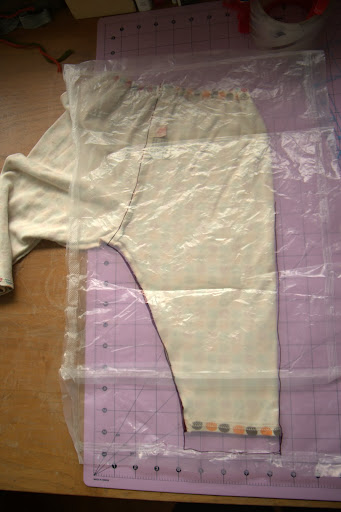
step 6:Â lay the front and back pattern pieces on top of each other, lined up along the inseam (the inside of the leg) and make sure that your hems are the same length in front and in back.
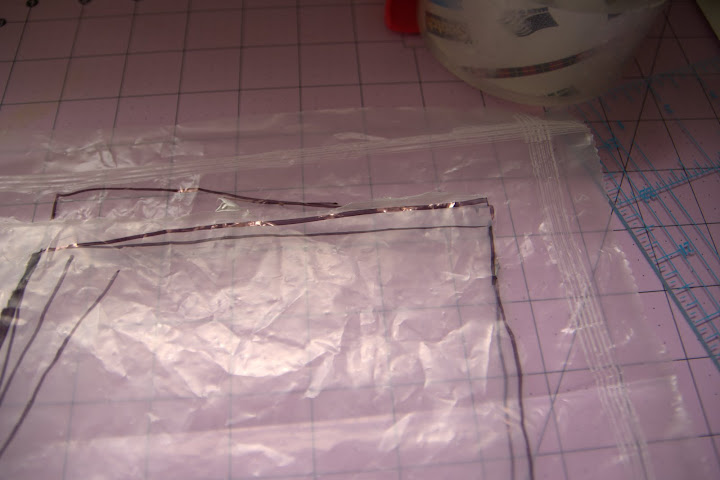
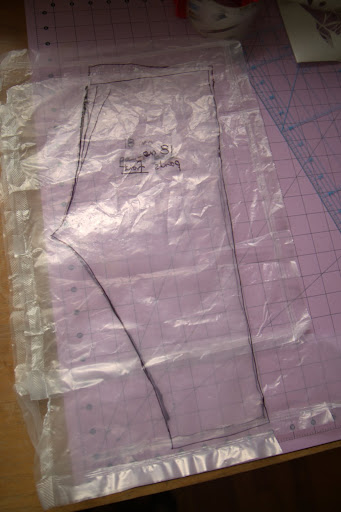 step 7: also check the waistband. they shouldn’t be the same height all the way across (the front panel should be shorter at the center seam) but they should be the same height on the outside-of-the-leg seam.
step 8: test your pattern! i used a turtleneck t-shirt i’d picked up while thrifting as my fabric. here’s the before shot:
 step 9: i decided i didn’t want a seam along the side of this pair of pants, so i taped my two pattern pieces together along the side seam, creating a single pattern piece for pants. then, i cut out both legs at the same time (this ensured that i didn’t cut two legs facing the same direction which would have resulted in one inside-out leg. which wouldn’t have been a really big deal, but it would be a little weird).

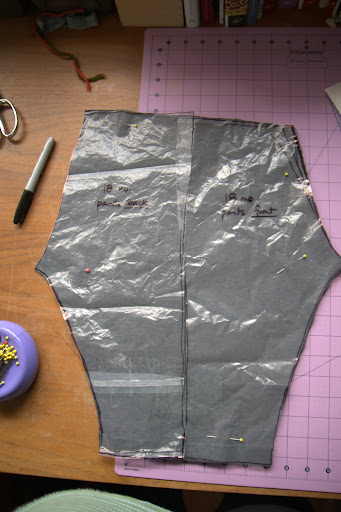
step 10:Â follow this tutorial i posted way back when to sew up your pants.
step 11:Â ask your model to try them on and evaluate the results:
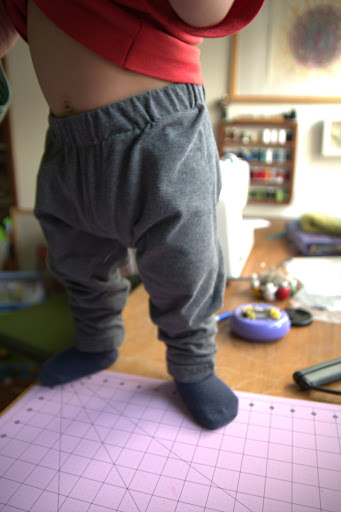
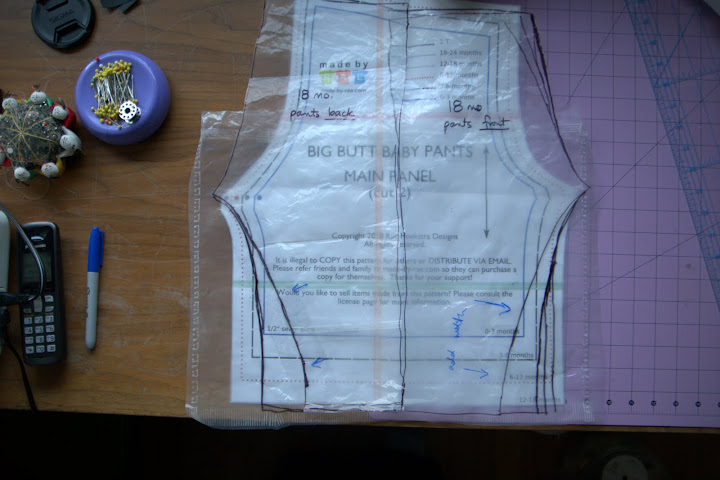
not too bad, but a little narrow legged for the look i was going for (hmmm… perhaps i should have double-checked that my “pants-that-fit” really did fit before making a pattern from them?) so i decided to widen them. i’ve used the big butt baby pants pattern a number of times recently and i love it, but mr. happy stuff has pointed out that they do have reallllly wide legs, so i found that pattern, laid it behind the pattern i just created and aimed for a happy medium between the two. (i taped more plastic to my pattern so i could draw bigger legs.)
i was pretty sure that this adjustment would be fine for my next project, so i decided to dive in. awhile back, i’d seen this fantastically inspiring post and knew i had to try it soon. the last time i went to the dig & save, i picked up four pairs of pants to try this out on. here’s the before pictures of the first pair (i didn’t have high hopes for these because of the super-long zipper and the general dressiness of the pants and the big wide inner waistband, but i thought they’d be a good trial pair).

and this picture gives you a little sneak peek into the process:
 basically, i laid my pattern (folded in half, tracing only the front half onto the front of the pants and the back half onto the back of the pants) on top of the pants and traced around it with a tiny sliver of soap. then i did the same to the back, cut out both pieces and sewed them together along the inseam. (and yes, i had to cut through that super long zipper, but it wasn’t as big of a deal as i thought it might be) then, i realized that i wanted the front of the pants to be flat-front (i.e. no elastic gathering the top) which made them waaaay too wide. so i placed a pair of the happy baby’s jeans on top of the new pants to see just how narrow i might want the front and eyeballed the adjustment (yes, it meant losing the cute little front pocket).
if you click though to that last tutorial link, you can see more detailed instructions on how to turn big pants into little pants, but here’s how my first pair turned out:


and just for fun i added a contrasting cuff liner (which, according to mr. happy stuff, takes them from a normal, almost dressy pair of pants to “just crazy”) and then tried them on my model again:

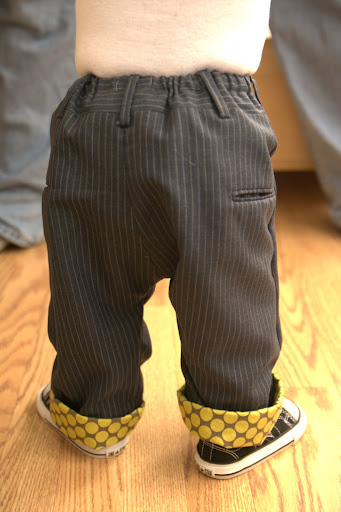
yes, the zipper is kind of hilarious, but it actually makes getting the pants off and on really easy! i’m actually quite tickled with how well they turned out and they make me smile every time i see them. i made a second pair that i’ll show you another time and now that i’ve made the pattern twice, i might consider lowering the waistline a little for a third pair. these both ended up a little high-waisted (likely because i forgot to remove my allowance for a waistband hem when i laid the pattern on top of the pants. oops!) but that also accommodates a big cloth diaper butt better, so we’ll see. i’ll let him wear these two pairs for awhile and evaluate them after a few real-world experiences.


3 Responses to sewing by the seat of my pants: a tutorial